Showing posts with label Scrapbooking. Show all posts

Saturday, October 27, 2012

Three Challenges in One LO

It has been a whirlwind two and a half weeks.  On October 10, I left for DC for the SGK 3-Day.  I was able to hang with my friends Michelle and Joe (who had just gotten engaged), then met a whole bunch of new friends over the weekend, and then Sunday night I got to have dinner with Nicole, Craig, their kids and Kathy and Craig (some friends from college who I don't get to see very often).  It was quite the fun and exhausting weekend, and Monday proved to be exhausting as well as I spent 10 hours in the Newark airport even though time-wise I could have driven home and back again in that time.  I was just toooooooo tired to trust myself to do so.

Then when I got back, it took me an entire week to recuperate.  I slept so well, even through some of my DD's fussing, which I don't normally do.   I got nothing done that week crafting wise or other.  Then what did we do, well we proceeded to jump in the car and drive to Lehigh for our first football game of the season (in person).  We did this even though we knew we had to drive back right after the game in order to get DS back for his First Communion Class on Sunday morning.  So during the drive home, what proceeded to happen -- we hit a buck going 65mph!!!!!  ARGH!!!  That was quite the juggling of things trying to figure out the logistics of how to get home.  Luckily we were able to ask for and get an extended cab flat bed truck so we could fit all four of us (with car seats) in the truck.  Luckily we have AAA Plus - which gives us 100 free miles of towing.  We ended up paying for only 5 miles!!!  Whew!!!  Of course at least 2 of that was because we asked the tow truck driver to take a detour past our house so we could get our other car so we could get home from the car dealership.  Well worth it!!!

So this week I've been dealing with the insurance company and everything.  Luckily we have a rental rider on our policy (learned that one the hard way from another accident), so we have at least had two cars this week (and will for next week also).  They ended up totaling the car (which was mine - CRV), so today we are going to look for a new one.  Not really what I wanted to do right now, but we got a good settlement considering the car was 7 years old.  So I think we'll do okay and be able to get a car/SUV that I want.  I would like to get another CRV, as I'm convinced that it was the car that made sure we were as safe as we were - any other car the same size or smaller would have had the windshield blown in with what happened.

Anyway, this past week, even with all that going on, I did manage to get some crafting in (thanks to the fact that I'm not working).  However, this one LO took forever to do - much longer than usual.

So the three challenges that I combined were my monthly Focus Group for CC (we had to create something that Pinterest inspired), the weekly challenge on CC (use a neutral and 3 brights), and the weekly challenge for the Paper Girls Challenge Blog (this one was picture inspired).  The one LO I did was about my DS's swimming lessons last summer.  With this LO, I could have used many different themes, but chose this one because those were the first of the many pictures already printed that I picked up.

So the inspiration from Pinterest was a one page LO that I found by Jessica Sprague.  I loved the large circles for the main photo.  And it went with the circles on the picture inspiration from Paper Girls.  As for the neutral, I instantly thought of the Kraft Funday paper from MME, and knew that would work with this theme.  However, when I looked at it, I knew it would have to be used as a supporting paper, not the main paper, like I was originally thinking.  Mainly because I didn't have two pages that matched, and I am anal about my main papers matching on 2-page LO's.  So here is the inspiration LO:


And here is the LO I created from it:


My focus picture was smaller then her's, so I double matted it.  I used orange, blue and yellow as my bright colors for CC, and pulled the circles and orange from the picture for PGB.  The only issue I have with the LO is that I think I made the background a little busy for the title.  But the basic cardstock was too plain.

So the products used were:  Bazzill yellow cardstock, Bazzill blue cardstock, Bazzill orange cardstock, MME Kraft Funday paper, MME Kraft Funday Happy Days twine, MME Kraft Funday Everyday wood banner, MM circle cutter, Sassafras cameo brads, AC thickers regards, MM creative letters DOTS, SU Brilliant Blue ink, SU Circle Circus stamps, 1.5inch circle punch, 1inch square punch and SU scalloped border punch.

Friday, September 14, 2012

GO BIG - Paper Girls

This week's Paper Girls Challenge was to GO BIG!!!  We were supposed to use a larger size photo - 5x7 or bigger.  So I decided to use one of the many photos from my first 3-day walk.  It happened to be one of the port-o-potty lines!!!  At every pit stop, there was a line of port-o-potties for us to use, and we found it humorous, as it is rare to see so many at once.

Walking as far as we do also starts to get to your emotions and patience.  So one of the ways we tried to make ourselves laugh, was when we saw a sign announcing a pit stop, we would start saying that we needed to "go potty", which one time got us to "the loo".  You kind of had to be there to fully appreciate the humor in it.

Anyway, here is the LO:


The products I used were: SU In Color blue cs, and Pink Passion Ink; OT BC stamps and button; MAMBI paper; MM cheeky shimmer stickers - pink; cs scraps; MM glitter clears - flowers; lattice border punch.

I had fun making this LO.  Hope you have fun looking at it.

Friday, August 31, 2012

Getting Messy, Summer and Scraplift

So this week, I decided to try to combine three challenges!!!  And I have to admit, it was a little daunting at first figuring out exactly how to do it.  I had many ideas floating around in my head, but they all seemed too complicated.  And of course, I waited til the last minute for one of the challenges to finish it. 

The Paper Girls challenge was to get messy - that was pretty easy to figure out, it was just what shape I was going to mask. 

The Crop Chocolate challenge was to celebrate summer, and it had to incorporate water - that was easy, I had pictures of my DS from swim lessons last year to scrap. 

The third was a challenge from two of the ladies at Crop Chocolate - to scraplift a LO they did on a retreat they went to.  The LO included a large heart made up of different size circles of different colors and patterns.  You can see the LO and the story behind the challenge here.  This was the hard part.  I didn't really want a heart on a swim page, so what shape could I use????  At first I was thinking wave, but I got scared off by the sharpness of the wave end (yes I'm a wuss sometimes).  Then since I picked pictures of my DS going down the water slide, I thought: what about a splash shape? 

So I went into my Silhouette library and found a perfect splash shape and cut two different sizes.  The large one I used as is, and added the word SPLASH on it.  The smaller one I used as a mask, and then added also to balance the LO.  Within the masked area, I added buttons, and punched circles to create the splash.  At first I didn't really like how it turned out, but then I decided that maybe adding some depth to some of the circles might help.  So I added some glossy accents to some of the smaller circles.  Here is a close up of the "splash".    I still not thrilled with it, and I'm wondering if it's because I tried mixing the buttons and the paper.

I also used the ink and sponge on the edges of the argyle paper to diffuse it a little bit against the rest of the patterns - it was standing out a little too much for my liking without it.

Here is the finished project.  I think overall, I like it.  I just need to practice more on using circles to make other shapes (and some shapes are harder than others to do). 

Products used:  Silhouette, EP Sweet Summertime 12x12, Bazzill blue cardstock, TH distress stain - chipped sapphire, BG buttons, SU brilliant blue ink, circle punches, AC thickers - patchwork, Glossy accents.

Monday, June 11, 2012

Scrappy Space Blog Hop Winners

First of all, I want to thank everyone who stopped by my blog during this past weekend's hop, and to those who left comments and became followers, mwah, mwah, mwah!!!

I hope you all had lots of fun visiting all our scrap spaces, I know I did.  It amazed me (and put me to shame) the quality of work that comes out of some of the smallest spaces!!!  I wish we could continue the experience of being the DT for CC a little longer (just because I had so much fun with it, and learned so much while doing it), but it is indeed time to say Adieu - so stay tuned in the next day or so for my finale.

In the meantime, and as promised, I would like to announce the winners from the hop.  Since I received well over the 30 comments, and got about 25 new followers, I have decided to increase the number of winners to three (that's right - 3)!!!


The first winner is comment number 46:

Love your huge workspace! I'm a new follower!


The second winner is comment number 15:

Love the cubes nice work area.


And the third winner is comment number 26:

I am in stamp envy! Thanks for sharing!
thecutandcluckclub@yahoo.com


Congrats to all!!!  Please email me with your addresses so I can send you your winnings!!!  I will give you a week to send me your info.  If I don't hear from you by Monday, June 18, I will pick another number.

Also, for some reason I could not reply to comments given, but someone had a question regarding the table top.  We made it out of 3/4inch MDF.  My DH took the router to the top edges and rounded it so that it wouldn't be so rough (and to make it look more professional).  Eventually I think I would like to paint it, but like it the way it is right now.

I also wanted to tell you all that I was smiling every time someone mentioned how wonderful my DH is - he certainly is wonderful and supportive!!  Sometimes I think he cringes inside when he sees me doing something crafty (because I spend more time there some weekends than anywhere else), and he certainly rolls his eyes every time a new box of chocolate arrives, but lately he has been more interested in what I'm making.  He is not one for compliments (one of the only times I've heard him say I look pretty/beautiful was on our wedding day - at least he said it then), but he actually said he likes my finale project - so it must be good LOL!!!

Friday, June 8, 2012

CC Scrap Room Blog Hop

Welcome to the farewell blog hop of the current Crop Chocolate design team (sniff, sniff)!!!  For this hop we decided that we would share our scrappy spaces (be they rooms, corners of rooms, or tables), and some organizational tidbits for you.  If you did not come from ScrapAddictsAttic (Paula M), or just happened upon this blog, please go to the start of the hop at Ambaju (Amber - our fearless leader).

For a long time, I used a collapsible 6foot table (the kind you see at churches for dinners and such) as my craft table, while sitting in a folding chair.  I did my scrapbooking and card making on it, while my sewing machine was constantly taking up valuable work space.  The table ended up so cluttered most of the time that I would actually carry my stuff over to the coffee table (where my kids would craft) instead.  Then I amassed so many supplies from Crop Chocolate and other places, that I needed more storage space also.  And I had a drafting chair just sitting collecting dust.  So shortly before Christmas I got this bright idea that maybe my DH would help me create a better work space, and he could do it while home with the kids for Christmas break.

So I told him my plan and ideas (which were fairly simple), and he went off and did one better.  Yay hubby!!!  The top of the table is now about 8feet long and 3feet deep.  The base is made up of the 14inch square cubes that you can get from various places (M's and ACM being two of them).  I had about six before, but had to buy more to fill in the space underneath (darn, while snapping fingers), and now have 12 of them of various arrangements.  The only problem is that the corner of the room is now a little crowded, but I can deal with that.

The dimensions were in my favor, as when we put the cubes in place we had left a space in the middle for cords and such to pass through (like when I use my sewing machine), but that space ended up being exactly perfect for my sewing machine to fit and sit on the base he made.  Luck was on my side that day.  I then used the space above my sewing machine to store my Cuttlebug dies and folders (they are in the blue cases - these are made by Cuttlebug and have pages that fit various sizes of dies and folders).

I also have a smaller table in the corner that I use for sorting pictures and storing smaller items like inks, extra adhesive, some ribbon and my clear stamps (as well as my overflow of paper).  The table is one I bought when I was in grad school, and has served us many purposes (dining room table, sewing table, etc) over the years.  I love baskets and try to use them to store these small things to make help it look nice.  They also allow for easy access to things.  The only problem is that they often don't stack well, so over the years, I've moved to some of the squarer baskets.

Under the table (and they ended up pushing the table up a little) are two filing cabinets I procured when my the company I work for moved to a different office (we were getting all new furniture and they were giving away the old stuff).  In the one cabinet, I have all the paraphenalia from trips and events that I need to scrap (I've got my work cut out for me).

In the other cabinet, I am storing the majority of my wood mounted stamps (a few of the smaller ones I felt would get lost are in the blue basket on top of the table).  I have them on end for easy access, and to read the label.  In the back of one of the drawers I have my 8.5x11inch cardstock.  I was hoping that I might be able to store my 12x12 in here, but they don't quite fit.  It would have been awesome though if it had.  In between the filing cabinets, there was enough room to store my extra cutting mats, scoring board, and t-square.

To help me remember which stamp sets I own (I think I need more though, LOL) and some examples of how the company has used them, I saved the catalog pages (most of them are from SU) and stored them in page protectors in a 3-ring binder (the red binder to the left of the table).  For those that you don't have a catalog page for, you can either photo copy the top images, or you could stamp the images onto a sheet of paper, making your own "catalog page".

For my 12x12 paper, I have various ways of storing it.  One of the cubes I got (which I think is fairly new) is a sliding drawer with hanging files.  In this cube, I have stored a lot of the kits I have bought for easy access - I feel they fit better in here with all the accessories they sometimes have.  I also have the slotted cubes (some I have in the vertical position, and some in the horizontal position - just for variety really).  In those I have the paper sorted by topic - Christmas, baby, boy, girl, seasons, etc.  I also have my stickers and other accessories sorted that way in the square drawers.

For my overflow paper (I have a lot, and it doesn't all fit in the cubes partly because I allowed two of the drawers to be stuff for my kids), I bought a few of the plastic 12x12 storage bins.  In those, I have sorted the paper by manufacturer (one bin for EP, one for MME, etc).  I also have those for projects I have started but haven't finished.

I don't know if you can make it out behind my big table, but I also have access to a two-shelf book shelf, which is where I store my idea books and magazines.  There are also some baskets, which is where I store my punches for now.  Eventually I would like to get some rods for the wall and hang them so that I can see them and remember which ones I have.  The other idea I have would be to use some cardstock and punch the images, and then store those similar to my stamp images.

I think that's all for now.  I hope you enjoyed reading about where I do my work, I certainly enjoy creating in this space (especially now that I have room to really spread out - I certainly love that I can keep my newly acquired Cameo on top of the table all the time and have plenty of room around it).  I also hope you learned something to help you store or sort your supplies.

If you leave me a comment and follow my blog (if you don't already), I will put your name in a hat for some blog candy.  Unfortunately, I didn't have time to actually figure out all that I'm giving away, but I can say that it will involve some alphas, some paper, and some other goodies.  If I receive more than 30 comments, I will give away two blog candies.  All comments received by midnight June 10 will be eligible.  I will draw the names on Monday, June 11, and will post the winner(s) then also.

I hope you have also enjoyed seeing my work over the last eight or so months, and have learned something from me.  I certainly enjoyed being on the DT and creating and learning new things.  I will miss the experience immensely, but will be looking forward to what the new DT has in store for us.

Now please join our next DT member Little Miss Crafter (Jamie) and enjoy her scrappy space.  I can't wait to see where she does her work.

Thursday, May 3, 2012

Spring ATC's

Every couple of months a group of ladies on Crop Chocolate do an ATC swap.  The first time I did this was last spring, and I enjoyed doing them.  However, since then, the timing just didn't work out for me.  But this time when it came up, I decided that I wanted to participate again.  The theme this time was "anything goes" - so I decided to go slightly spring-like with a pick-me-up sentiment to them. 

Then Paper Girls Challenge Blog decided to do a blog hop with extra chances to win an awesome prize coming by entering some ATC's.  Well here I go doing double-duty yet again!!!!

So, I ended up using mostly scraps for these, which unfortunately means I don't remember where everything came from.  I do know that there is some DCWV, some BG, and some MM English Garden.  Then I used the MS butterfly border punch, Fiskars doily border punch, SU star punch, tag punch, Su scallop circle punch, and the SU butterfly punch.  There is also some lemondrop baker's twine, some MM die cuts, and some other die-cuts.  I had a lot of fun making them.  Enjoy!!!

Focus group challenges

So I have been a little remiss in posting my Crop Chocolate Focus Group projects over the last few months.  I just haven't been very consistent about getting them up here.  Shame on me!!!!  Heehee!!!

Well, here you go.  For February's challenge, we were given a recipe of items to use in a project:  a pinwheel, 2 trims/ribbons, 3 colors, and staples.  We didn't have to use them all, but I tried to.  Howeever, I don't own staples that are safe, so I skipped that part.  Instead I used a brad.

CC Products used:  EP Happy Days 6x6, Mm celery ribbon, M fresh anthology picot daffodil ribbon, MM brad - paper reverie metallique.
 Non-CC products used: white cardstock and Mrs. Grossman's stickers.

March's challenge was a photo inspiration.  Amber's DH had made a comment comaring getting excited about scrapbooking to getting excited about a sunset, so she decided that would be our inspiration for that month's challenge.  At first this one was tough.  Of course, I could not find the pictures from the shore (that's about the only place I get the chance to take pictures of sunsets), so I decided to use the colors as my inspiration.  But I went with a somewhat subdued set of colors, which reminded me of MME's So Sophie Graceful set.

Then as I was going through some pictures I had to scrap, I decided to use the pictures of Sam's first days of Kindergarten.  As the basis for my LO inspiration, I used Sketch Inspiration's sketch #310 from due March 10.  For the challenge for SI, I used the sketch pretty much as was and documented Sam's first bus ride to school.

CC products used:  Bazill chips - paisleys, MME So Sophie Graceful paper and journal card and embelllishments, and FP It's the Little Things alpha.
Non-CC products used:  1, 1.25, 2.5 and 3inch circle punches, and SU more mustard ribbon.

Then, for the other half of the LO, which documents Sam's first day at school, I turned the sketch 90 degrees so that the shaped paper looked like a sun setting over the shore (similar to the photo). 

CC products used:  Bazill Chips - paisleys, MME So Sophie Graceful paper and journal card and embellishments.

Non-CC products used:  3inch scallop circle punch, 1inch circle punch, SU elegant eggplant ribbon, K&Co fresh paint die cut chipboard frame, SU tempting turquoise stamping spot, AC thickers - regards - patterned.

More focus group projects soon!!!

Friday, April 13, 2012

A sketch and a recipe

Yes, I did it once again - I combined two challenges together!!!  I can't believe how much time it really saves to do this.  Although I have to admit, this one took me a little longer to figure out just because the recipe was a very interesting one and I didn't want to stray too far from the sketch.  So here goes.

The sketch was from one of my fellow CC DT members that she made for the latest CropChocolate.com challenge.  We had to use this sketch and masking to create a project.

Oh how the ideas flowed.  I am on a kick right now to scrap the photos from my 2010 SGK 3-day walk, so I pulled out the 5x7 pictures, and picked one that I felt would work.  Then I pulled the recipe out from the Paper Girls Challenge Blog for their challenge this week and went to work figuring out how to combine them.  The recipe was: 1 photo, 2 journal cards, 3 ribbons/trims/twine, 4 stamped images, 5 non paper embellishments (brads, buttons, etc), and a bonus of 6 words in the title.  I have been having a lot of fun joining in on the challenges at PCG (they are up to 5 now), and haven't missed one yet (WOOHOO me!!!).

Here's what I came up with.  I'm pretty happy with how it turned out, except for the title.  I wish I was better at placing the letters so they are evenly spaced and fit all on one line.  The masking was done with a ribbon die-cut, a sponge and SU passion pink ink.

The background paper is from MME Kraft Fun Day Happy Days bundle (from CC).  The blue paper is from MME Stella and Rose Gertie (from CC).  The pink strips are from EP Be Mine 6x6 (from CC).

1 photo - self explanatary I hope.
2 journal cards - one cut from Be Mine paper, and one from Gertie - "Girly" sticker tag with date on it. 3 ribbons/trims/twine - yellow ribbon from Gertie, and two different colors of twine from Happy Days.
4 stamped images - heart, 2 sneakers and pink ribbon (from OT breast cancer set).
5 non paper embellishments - 2 different color buttons from Gertie, wood banner from Happy Days, flowers from MM glitter clears bright flowers (from CC), pink brad from Bo Bunny All Stuck Up (from CC).
6 words in title - I might have cheated here a little by using the numbers instead of the words, but I felt it had more impact that way.  Enjoy.

Friday, March 30, 2012

A sketch and an upcycled product

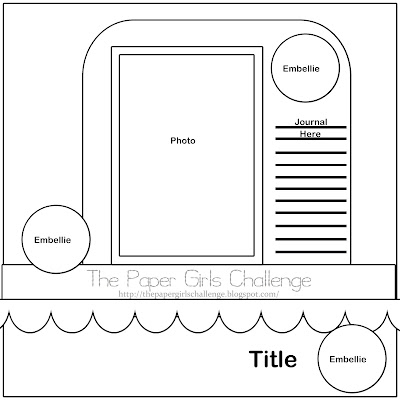
Here I go combining challeneges again.  This time it was Crop Chocolate's weekly challenge that was due March 20 - create a project using an upcycled flower.  And the other was the current Paper Girls challenge that is due today - use the sketch they gave.  Here is the sketch.

Something about this sketch spoke to me and said "one of those circles can be a flower"!!!  LOL

Then I had to figure out what I was going to use to make the upcycled flower.  A lot of the CC ladies used the packaging paper that comes with our CC orders, or soda cans, but I wanted to use something different.  Then when I saw one use a ribbon, and another use wire, it dawned on me that I could use....a SHOELACE.  And then I knew exactly what I was going to do. 

The first year I did the SGK 3-day walk, I had orderd SGK 3-day shoelaces.  Well they ended up being too short, so I stashed them away in my box of SGK stuff to save as momentos.  Luckily I knew exactly where that box was, and I pulled one out.  It worked perfectly (in my humble opinion).

Here is the LO I ended up with.  I ended up rotating the sketch 90 degrees because the picture I wanted to use was horizontal.  The CC bought products I used were: MME quite contrary Little Miss Muffet paper pack (including 12x12 paper, "Celebrate" die-cut (HIP HIP HOORAY), die cut stickers (arrow, butterfly, leaves and buttons), matching alpha, "Delight" journal spot).  Then I added MAMBI breast cancer cardstock (the one with writing), Queen & Co felt fusion border, and of course the shoelace.

When I first finished this LO, I didn't really like it because the title blended into the background too much, especially the darker letters.  So I posted it on the CC chat page, and asked for advice.  As expected, I got some awesome ideas - outline it with pen (black or white), use glossy accent, and stickles.  Since I didn't have much time to play around with it, I chose the quickest and easiest option - I pulled out my white gel pen and outlined all the letters.  I think it really helps make it work - it really lightens up the left side of the page.

To make the flower, I simply used my glue dots, and twisted the shoelace.  I did "mount" it on a piece of vellum to reduce the exposure to the paper below.  Hope you enjoyed this.  I had fun creating it.

Friday, March 16, 2012

Paper Girls Challenge this week

This week's challenge over at Paper Girls Challenge Blog was to use a stamp as a background or accent.  This is only their third challenge, and so far I have loved every one.  I hope to be able to continue participating.  Luckily they give you almost two whole weeks to complete a project for the challenge - I think that's what is going to save me.

Anyway, it's been awhile since I've played with some of my stamps.  I've been buying so many awesome patterned papers from CC, that I haven't had the excuse or reason to make my own.  Well, this challenge gave me that excuse - I loved it!!!

I decided to do both a stamped background and stamped accents.  Since I have wheels, it's easy to stamp a background.  I even pulled out some older pictures of my DS to use one this LO.  These are from when my DH and BIL had to travel to Boston for work during Christmas break.  Since my BIL is from Boston, my sister decided that she was going to go with them.  So the two of us followed the guys and made it a road trip with three kids under 5.  Of course, once we got there we had to find things to do - LOL!!  One of them was to go to the Children's Museum of Boston - they absolutely LOVED it there!!!  Here is the LO of my DS enjoying himself at just about every exhibit we felt was appropriate for an 18month old.  He bounced back and forth between some of them a lot.

For this LO, I used a lot of SU products - Simiply Scrappin' Primary Colors, Crayon ABC's wheel, Crayon Kids stamp set, Ruby Red ink, Brilliant Blue ink, Riding Hood Red ink and watercolor pencils.  Then I rounded it out with MM kids fresh sticker alphas - spotlight, and American Traiditional Deisgn - chipboard alphas.  The layout idea came from Sketch Inspirations - #233.

Friday, March 2, 2012

PaperGirls Challenge - photo strips

This week's challenge at The Paper Girls Challenge was to create a layout using a photo strip type idea.  I always LOVE this kind of idea because I have so many sequence pictures of my kids.  I found these really cute ones of my DS when he was about 1, playing in his toy basket.  The whole concept of that started when my DH put him in there one time, just to see what would happen.  Well DS liked it, and then when he was able to, would start to climb in by himself.

I used SU Simply Scrappin kit - Toy Box (and old one that I've been saving up for just this kind of thing), OT flower and circle background shapes, MM metro mini shimmer alphas in gold, and 1.25inch and 1inch circle punches.  To give the circle a little more depth, I used a dauber and SU marigold morning ink to pat it.

I had a lot of fun with this LO, and need to use this concept more so I can get some more pictures scrapped.

Friday, February 24, 2012

CC contest #4 - primary colors

There was another contest/challenge on Crop Chocolate, and this time it was to make a project using ONLY primary colors - red, blue and yellow.  Of course, my mind first went to school pictures and the fact that I was a little behind with Sam's pictures.  So I pulled out some packets of pictures and LO's to scraplift that I had saved for "future" use.  One of them was perfect for this challenge - the second year my DS was in the Penguin room at his daycare.

My goal was to use all CC bought products.  However, I got to a point where I knew that by adding the ribbon it would add more than just adding the buttons.  So I failed at my goal.  Oh well.

I used EP's Little Boy, Bo Bunny All Stuck Up buttercup buttons, MM giggle kids rub-ons and looking glass stickers, and SU tempting turquoise ribbon.

The LO I lifted was from Scrapbooksetc Feb/March 2008 magazine, page 125.  I really liked how there was a "frame" about the LO.

Of course, once I got this LO done, I decided to finish the other LO I had pulled out - the first year DS was in the Dragon room at daycare.  I had already picked out papers and some embellishments for this one, so I decided to stay with them.  Unfortunately, since I had laid this out a few years ago, I don't necessarily remember where everything is from.  OOPS!!

Of those that I do remember or I picked as I went, OT preschool paper kit, DCWV mat stacks bright coordinating prints, BG chipboard alpha, Offray MyMoments sticker ribbons, MM kids fresh alpha stickers - spotlight, MM tiny alpha stickers - white and black, MAMBI monograms rub-ons.  The dragons are from clip art I found on the web.

The LO I lifted is also one I found on the web a few years ago.  I wish I could remember from where.

Well, there's two more LO's from my "to do" pile.  How many more???  sigh......

Thursday, February 16, 2012

Another new challenge - a sketch

Thanks to a friend of mine, Amber, I found this new LO challenge from Paper Girls Challenge.  And I loved the sketch they had for this first time.


 It is so simple, but you can say so much with it.  At first I had trouble determining which picture to use for it, but then I realized it would be perfect for my DS's school picture this year.  So here is what I came up with:


It actually came together pretty quickly.  I used the following products:  SU simply scrapping kit - primary colors, Recollections kraft cardstock, MM school days packaging tape, Offray birthday ribbon, SU bakers twine - early espresso, Craft & Craftin Metal style dimensional stickers, ribbon edge punch, SU more mustard ribbon, MM puffy alpha - Giggle Kids, American Crafts Regards thickers, and misc cardstock from scraps.